Looking for a new opportunity as DevOps engineer
I am currently seeking a new opportunity as a DevOps Engineer, available from February 2026. I am open to remote or hybrid work from Prague, Czechia (Europe), for a long-term, full-time position or B2B contract - 300 EUR / daily. Please feel free to contact me for further details. You can also review my professional background on my LinkedIn profile.
Setting Up Custom SSL Authority for HTTPS on Nexus Sonatype
Configuring Nexus Sonatype to serve HTTPS traffic using a custom SSL certificate involves replacing the default Jetty configuration and keystore with your own. This allows you to use a certificate signed by your internal Certificate Authority (CA), improving security and trust within your network environment.
Step 1: Edit the Jetty HTTPS Configuration#
Nexus uses Jetty as its web server, and SSL/TLS settings are configured via the jetty-https.xml file. This file is located in the installation directory at:
$install-dir/etc/jetty/jetty-https.xml
For example, if Nexus is installed under /opt/nexus, the full path would be:
/opt/nexus/etc/jetty/jetty-https.xml
Inside this file, you specify the path to your keystore and its password. Below is a relevant snippet from the Jetty config to set these values:
<Set name="KeyStorePath">
  <Call name="resolvePath" class="org.eclipse.jetty.xml.XmlConfiguration">
    <Arg><Property name="ssl.etc"/></Arg>
    <Arg><Property name="jetty.sslContext.keyStorePath" default="keystore.jks" /></Arg>
  </Call>
</Set>
<Set name="KeyStorePassword">password</Set>
KeyStorePathpoints Jetty to the keystore file. By default, this is expected to bekeystore.jks.- Replace
passwordwith the actual password for your keystore.
Step 2: Locate and Manage Your Keystore#
Your SSL keystore is stored separately from the Nexus installation, typically under the data directory at:
$data-dir/etc/ssl/keystore.jks
In common installations, it might be here:
/opt/sonatype-work/etc/ssl/keystore.jks
This file contains your private key and the certificate chain, which Jetty will use to establish HTTPS connections.
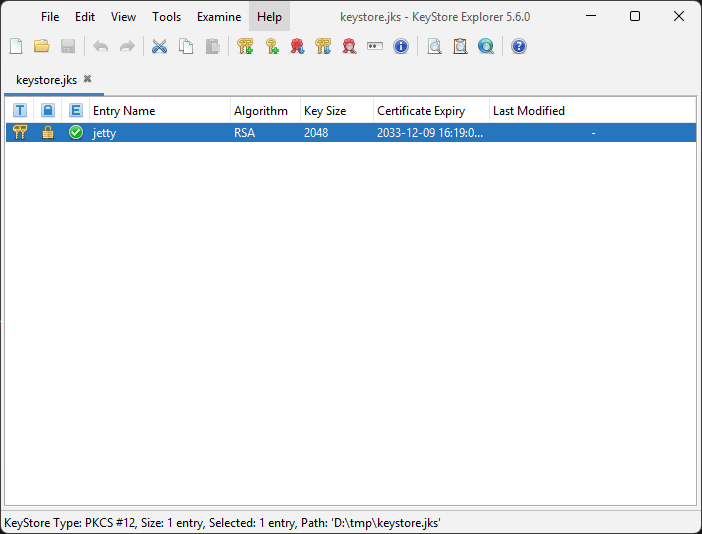
To easily manage and edit this keystore, you can use the graphical Java KeyStore Explorer:
https://keystore-explorer.org/downloads.html
This tool allows you to:
- Import private keys and certificates.
- Ensure your certificate is correctly imported.
- Set the key alias to
jetty, which is required for Nexus to find it.
Screenshot#
Step 3: Generate and Sign Your Custom Certificate#
If you want to use a certificate signed by your own Certificate Authority (CA), the steps are:
- Generate a private key and a Certificate Signing Request (CSR) for your Nexus host.
- Submit the CSR to your internal CA to be signed.
- Import the signed certificate back into your keystore with the alias
jetty. - Also import the CA’s root certificate and any intermediate certificates if applicable.
Make sure the full certificate chain is trusted by clients connecting to Nexus.
Step 4: Restart Nexus#
After updating the keystore and Jetty configuration, restart your Nexus instance to apply the changes. The server should now serve HTTPS connections using your custom certificate.
Additional Resources#
For detailed official guidance, see the Sonatype documentation on configuring SSL with Nexus:
Looking for a new opportunity as DevOps engineer
I am currently seeking a new opportunity as a DevOps Engineer, available from February 2026. I am open to remote or hybrid work from Prague, Czechia (Europe), for a long-term, full-time position or B2B contract - 300 EUR / daily. Please feel free to contact me for further details. You can also review my professional background on my LinkedIn profile.