Looking for a new opportunity as DevOps engineer
I am currently seeking a new opportunity as a DevOps Engineer, available from February 2026. I am open to remote or hybrid work from Prague, Czechia (Europe), for a long-term, full-time position or B2B contract - 300 EUR / daily. Please feel free to contact me for further details. You can also review my professional background on my LinkedIn profile.
Managing Kubernetes from Neovim: Installing kubectl.nvim on Ubuntu 24
kubectl.nvim is a Neovim plugin that lets you browse and manage Kubernetes clusters directly from your editor — without leaving your coding environment. This guide covers a complete setup from scratch on Ubuntu 24, including Neovim, lazy.nvim as the plugin manager, and kubectl.nvim itself with true color support.
What is Neovim?#
Neovim is a modern, extensible text editor built on top of the classic Vim. It runs entirely in the terminal, is controlled via keyboard shortcuts, and is highly configurable through Lua scripts. Unlike traditional IDEs, Neovim starts instantly, works over SSH, and can be extended with a rich ecosystem of plugins — making it a popular choice among developers who prefer staying in the terminal.
kubectl.nvim takes advantage of Neovim’s buffer system to render Kubernetes resources as interactive, navigable views directly inside the editor. The plugin is open source and available at github.com/Ramilito/kubectl.nvim.
Step 1: Install Neovim#
Install Neovim using snap, which always provides the latest stable release:
sudo snap install nvim --classic
The --classic flag is required because Neovim needs unrestricted access to the filesystem to read and write your config files and plugins.
Step 2: Install kubectl#
Add the Kubernetes apt repository and install kubectl:
sudo apt-get update
sudo apt-get install -y apt-transport-https ca-certificates curl gnupg

curl -fsSL https://pkgs.k8s.io/core:/stable:/v1.32/deb/Release.key | \
  sudo gpg --dearmor -o /etc/apt/keyrings/kubernetes-apt-keyring.gpg

echo 'deb [signed-by=/etc/apt/keyrings/kubernetes-apt-keyring.gpg] https://pkgs.k8s.io/core:/stable:/v1.32/deb/ /' | \
  sudo tee /etc/apt/sources.list.d/kubernetes.list

sudo apt-get update && sudo apt-get install -y kubectl
kubectl.nvim uses kubectl under the hood via a local proxy, so a working installation is required.
Step 3: Create the Neovim Configuration Structure#
Set up the directory layout that lazy.nvim expects:
mkdir -p ~/.config/nvim/lua/plugins
The resulting structure will look like this:
~/.config/nvim/
├── init.lua
└── lua/
    └── plugins/
        └── kubectl.lua
Step 4: Bootstrap lazy.nvim in init.lua#
Create ~/.config/nvim/init.lua with the lazy.nvim bootstrap and true color support:
cat > ~/.config/nvim/init.lua << 'EOF'
-- Enable true colors
vim.opt.termguicolors = true

-- Bootstrap lazy.nvim
local lazypath = vim.fn.stdpath("data") .. "/lazy/lazy.nvim"
if not vim.loop.fs_stat(lazypath) then
  vim.fn.system({
    "git", "clone", "--filter=blob:none",
    "--branch=stable",
    "https://github.com/folke/lazy.nvim.git",
    lazypath,
  })
end
vim.opt.rtp:prepend(lazypath)

vim.g.mapleader = " "
vim.g.maplocalleader = "\\"

require("lazy").setup({ { import = "plugins" } })
EOF
lazy.nvim is automatically cloned on first launch — no separate installation step is needed.
Step 5: Add the kubectl.nvim Plugin Spec#
Create ~/.config/nvim/lua/plugins/kubectl.lua:
cat > ~/.config/nvim/lua/plugins/kubectl.lua << 'EOF'
return {
  {
    "ramilito/kubectl.nvim",
    version = "2.*",
    dependencies = "saghen/blink.download",
    config = function()
      require("kubectl").setup()
    end,
    keys = {
      { "<leader>k", '<cmd>lua require("kubectl").toggle()<cr>', desc = "Kubectl toggle" },
    },
  },
}
EOF
Using version = "2.*" pulls a pre-built binary via saghen/blink.download, so no Rust toolchain is required.
Step 6: Launch Neovim and Install the Plugin#
Start Neovim:
nvim
On first launch, lazy.nvim bootstraps itself and immediately downloads kubectl.nvim and its binary. Once the install completes, restart Neovim.
Step 7: Open kubectl.nvim#
Press Space + k to toggle the plugin, or run the command directly:
:Kubectl
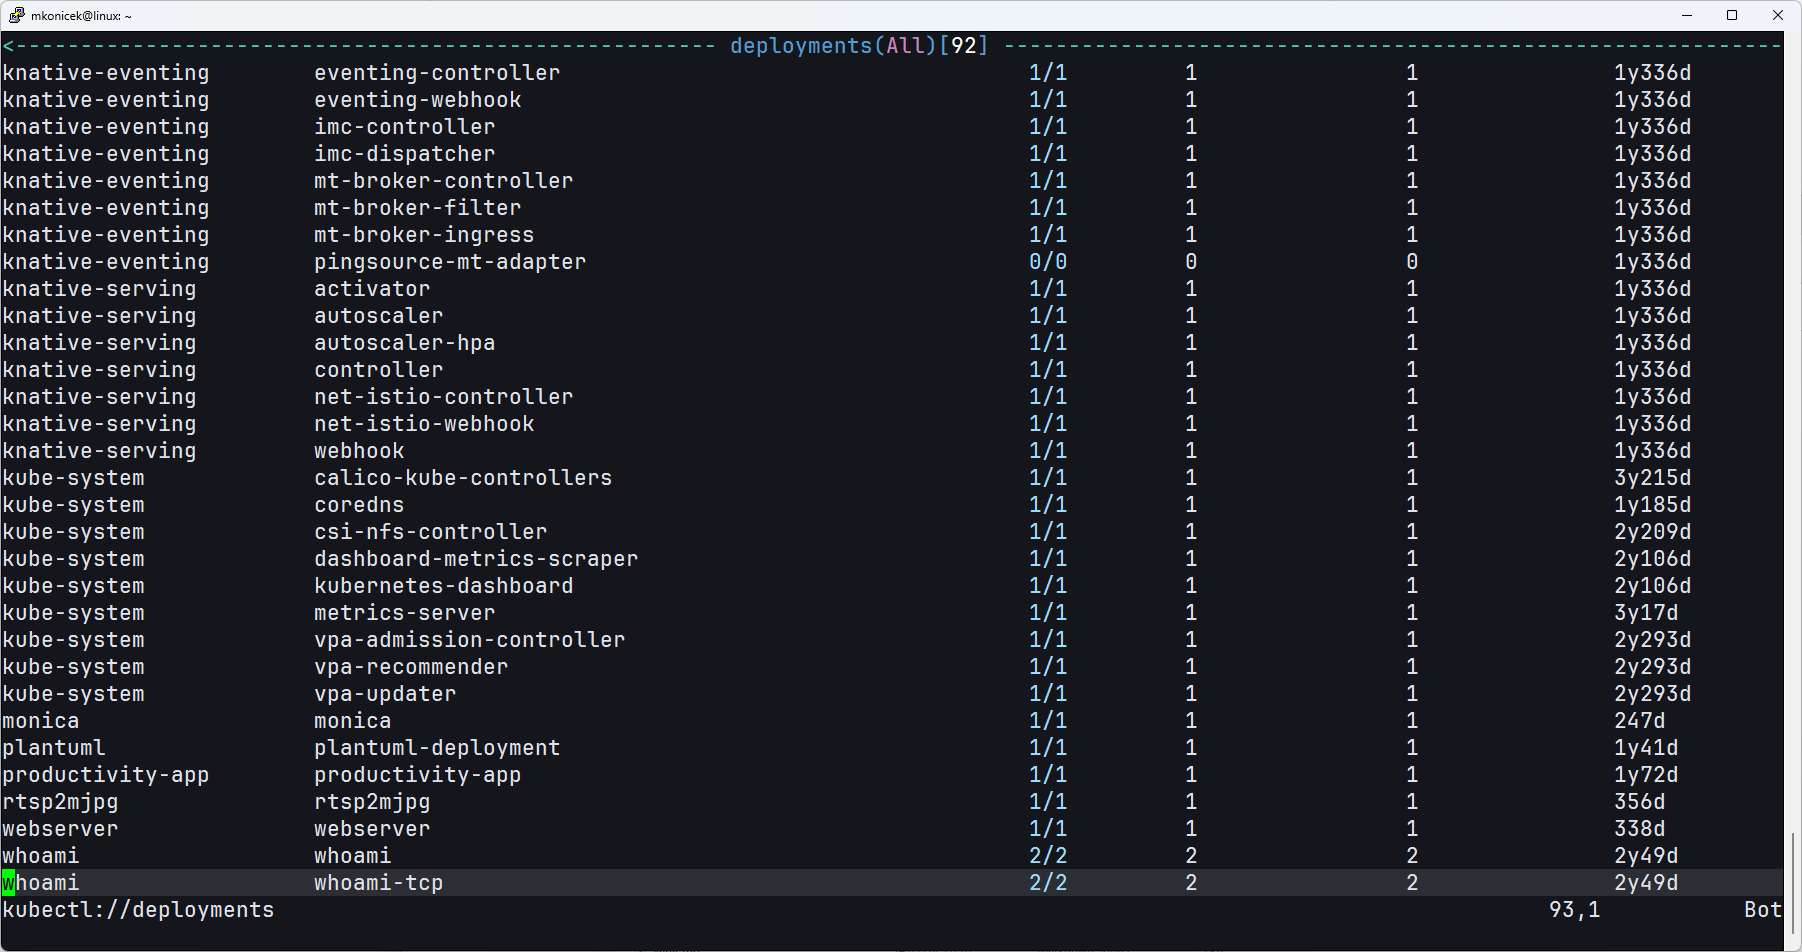
You should see your cluster resources with full color output. Make sure your kubeconfig is present at ~/.kube/config and points to a reachable cluster.
Navigating the Interface#
Once kubectl.nvim is open, you navigate it like any Vim buffer — using j/k to move up and down, and Enter to select a resource. The plugin provides a set of global keymaps available in any k8s_* buffer:
| Key | Action |
|---|---|
g? |
Open help float — shows all available keymaps for the current view |
gr |
Refresh the current view |
gs |
Sort by column |
gd |
Describe the selected resource |
gy |
View the resource YAML |
ge |
Edit the resource (opens in a buffer) |
gD |
Delete the selected resource |
<BS> |
Go back to the previous view |
<CR> |
Select / drill into a resource |
To open the help float at any time, press g?. It always reflects the keymaps available in the current view.
Switching Between Resource Views#
From any k8s_* buffer, you can jump directly to common resource views using number keys:
| Key | View |
|---|---|
1 |
Pods |
2 |
Deployments |
3 |
Services |
4 |
ConfigMaps |
5 |
Secrets |
6 |
Namespaces |
7 |
Nodes |
8 |
Overview |
This lets you quickly switch between resource types without going back to the top-level view.
Troubleshooting: No Colors in the Terminal#
If the interface appears without colors, verify that your terminal supports true colors:
echo $TERM
echo $COLORTERM
$TERM should return xterm-256color and $COLORTERM should return truecolor. If $COLORTERM is empty, add the following to your ~/.bashrc or ~/.zshrc:
export COLORTERM=truecolor
Then reload the shell:
source ~/.bashrc
The vim.opt.termguicolors = true line in init.lua (added in Step 4) tells Neovim to use 24-bit color — but it only works when the terminal advertises true color support.
Looking for a new opportunity as DevOps engineer
I am currently seeking a new opportunity as a DevOps Engineer, available from February 2026. I am open to remote or hybrid work from Prague, Czechia (Europe), for a long-term, full-time position or B2B contract - 300 EUR / daily. Please feel free to contact me for further details. You can also review my professional background on my LinkedIn profile.